

You can design, assemble, and hang a clear, photo-ready birthday banner in under 45 minutes using a printed vinyl or ready-made pennant from Usnovelty. The fastest reliable approach: grab a ready-made pennant for quick color-pop decor, a printed vinyl banner for photo backdrops, or a fabric banner when you want a premium indoor look that photographs without glare.
30-second setup checklist:
- Pick your banner type: pennant, printed vinyl, or fabric
- Gather tools: scissors, string or rope, command hooks or grommets, tape measure
- Measure your wall or backdrop space before ordering
- Assemble flat on a table, then hang using the method that fits your surface
- Run a final tension and visibility check 15 minutes before guests arrive
Total time: 15 minutes for a ready-made pennant, 30–45 minutes for a printed vinyl or fabric banner from flat to hung.
Key Takeaways
A printed vinyl or ready-made pennant banner from Usnovelty is the fastest path to a photo-ready birthday setup, taking 15–45 minutes from unboxing to hung.
| Point | Details |
|---|---|
| Pick the right material | Use 13oz vinyl outdoors, polyester fabric for indoor photo backdrops, and cardstock pennants for quick DIY installs. |
| Size before you order | A 3’×6’ banner fits a 6-foot table; photo backdrops need at least 4’×6’ for solo shots. |
| Hang the banner first | Set the banner before tables, balloons, and furniture so adjustments stay easy. |
| Double your attachment points outdoors | Space grommets every 24 inches and use bungee cords to prevent wind damage. |
| Usnovelty ready-made options | The Birthday Balloons Pennant Banner and Happy Birthday Sign Banner cut setup to under 10 minutes with no tools required. |
Table of Contents
- What materials and tools do you actually need for a birthday banner?
- How do you size a birthday banner for your space?
- Step-by-step assembly for three common banner types
- How do you hang a birthday banner safely and securely?
- Common birthday banner mistakes and how to fix them fast
- Which Usnovelty products should you buy for your setup?
- Final styling, photography, and storage tips
- The setup approach most people overlook
- Ready to order your birthday banner from Usnovelty?
- Sources
What materials and tools do you actually need for a birthday banner?
The right material depends on where the banner goes and how long it needs to last. Get this wrong and you end up with a sagging paper banner outdoors or a stiff vinyl sheet in a cozy living room that catches every flash reflection.
Materials by banner type
Fabric and polyester banners photograph with almost no glare, drape naturally, and fold flat for storage. They work best for indoor backdrops and premium setups. The tradeoff: they wrinkle if stored carelessly and need a dowel or rod pocket to hang straight.
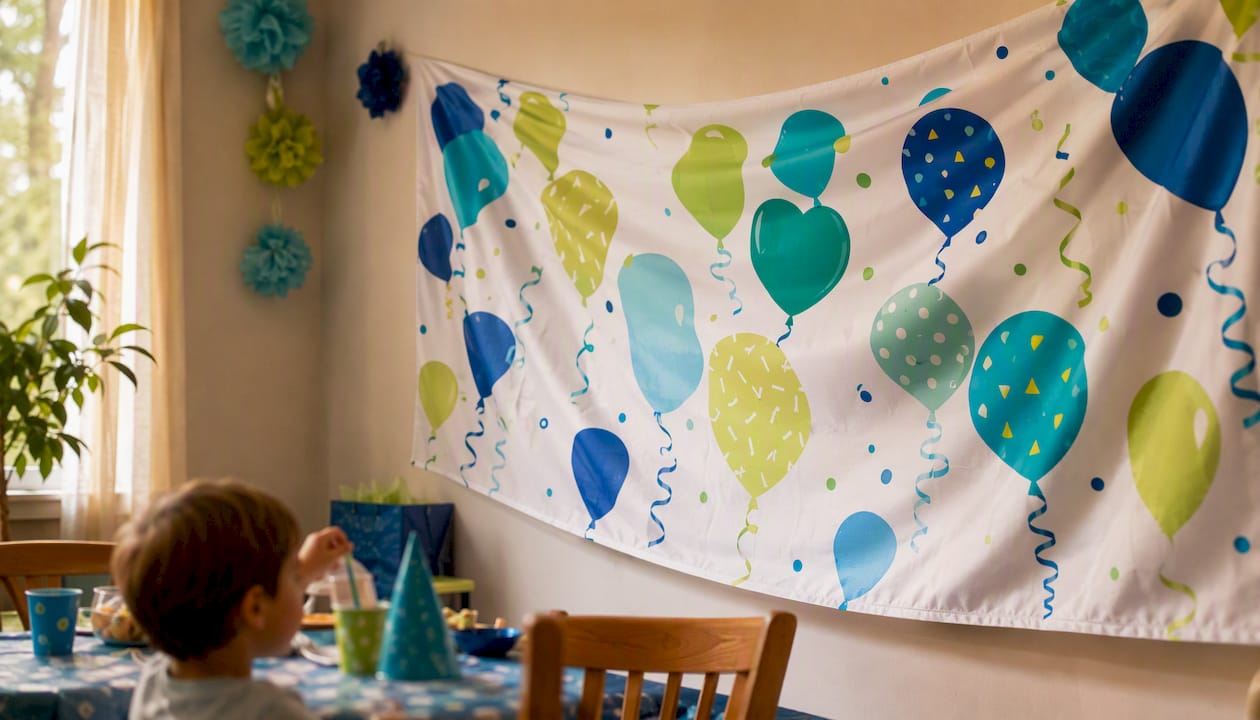
13oz vinyl is the go-to for outdoor use. It handles wind, humidity, and direct sun without fading or tearing. Grommets punched into reinforced corners let you tie it to a fence, pavilion post, or banner stand. Vinyl banners work outdoors with grommets; polyester fabric is the better pick for indoor photo backdrops where glare matters.
Cardstock and laminated paper pennants are the budget-friendly, DIY-friendly option. They look great in photos when the lighting is controlled, and laminating them adds enough durability for reuse. They are not outdoor-safe without a waterproof coating.
| Material | Best for | Durability | Indoor/Outdoor |
|---|---|---|---|
| Polyester fabric | Photo backdrops, premium indoor | Medium | Indoor only |
| 13oz vinyl | Outdoor setups, photo backdrops | High | Both |
| Cardstock/paper | DIY pennants, quick installs | Low | Indoor only |
| Laminated paper | Reusable pennants | Medium | Indoor only |
Tools you need
- Tape measure and pencil
- Scissors or a rotary cutter
- Grommet kit (for vinyl banners)
- Heavy-duty tape or painter’s tape (for rental walls)
- Hole punch (for paper pennants)
- String, twine, ribbon, or fishing line
- Dowel or tension rod (for fabric banners)
- Command hooks or adhesive strips (rental-friendly)
- Zip ties (for fence or pavilion mounting)
- Iron or heat gun (for wrinkle removal on fabric)
Pro Tip: If you are using a grommet press for the first time, practice on a scrap piece of vinyl first. The die needs to be centered exactly over the hole or the grommet will split. For paper pennants, reinforce each punch hole with a small piece of clear tape on the back before stringing — it prevents tearing after the third reuse.
How do you size a birthday banner for your space?
Sizing is where most people guess wrong. A banner that looks fine in the product photo can disappear against a busy wall or crowd out a small room. Measure first, order second.
Step-by-step measurement method
- Measure the full width of the wall, fence, or backdrop area where the banner will hang.
- Subtract 12–18 inches from each side so the banner does not crowd the edges.
- Note the ceiling height or the height of the mounting point. For photo backdrops, the bottom edge should sit no lower than 12 inches above the tallest person’s head when they stand in front of it.
- Estimate how far away guests will stand. Letters need to be at least 1 inch tall per 10 feet of viewing distance to read clearly.
- Match those dimensions to the nearest standard size below.
Recommended banner sizes by placement
| Placement | Recommended size | Notes |
|---|---|---|
| Above cake table | 2’×4’ or 3’×5’ | Fits a standard 4–6 ft table width |
| Doorway or mantel | 3’×6’ | Reads well from 10–15 ft away |
| Living room backdrop | 3’×6’ or 4’×6’ | Fits behind a 6-foot table |
| Photo backdrop (solo/couple) | 4’×6’ minimum | Captures full-body shots cleanly |
| Photo backdrop (group) | 6’×8’ minimum | Fits 4–6 people standing |
| Patio fence or outdoor | 4’×6’ | Allows grommet spacing every 2 ft |
Design layout checklist
- Set letter height at 1 inch per 10 feet of viewing distance (a 20-foot room needs 2-inch letters minimum)
- Use high-contrast color combinations: dark text on light backgrounds, or white on deep jewel tones
- For printed banners, export files at 300 dpi with a 0.25-inch bleed on all sides
- Center the main text and leave at least 2 inches of margin on each side
- If adding a photo, place it to one side and keep the text on the opposite half so neither competes
For photo backdrops specifically, scale up one size from what feels right. A 4’×6’ banner that looks generous on paper often feels cramped once you add a balloon arch in front of it.
Step-by-step assembly for three common banner types
Each workflow below is rated by skill level so you know what you are getting into before you start cutting.
Sewn or fabric banner (skill level: intermediate, 45–60 minutes)
- Cut pennant triangles or rectangular panels from your fabric, adding a 0.5-inch seam allowance on all sides.
- Iron fusible interfacing to the back of each panel to prevent fraying and keep the shape crisp.
- Fold the top edge over a dowel or rod pocket (about 1 inch) and stitch or use fabric glue rated for the material weight.
- Stitch or glue the side and bottom edges, then press flat with an iron.
- Thread the dowel through the pocket, or attach a hanging cord through grommets at each top corner.
- Lay the finished banner flat and check that all panels are even before hanging.
Verification step: Hold the banner at arm’s length and sight down the top edge. Any panel that dips more than half an inch needs the cord re-tensioned before guests arrive.
Printable paper or pennant banner (skill level: beginner, 15–20 minutes)
- Download a pennant template (letter-sized, landscape orientation works for most home printers).
- Print on cardstock at the highest quality setting your printer offers.
- Cut along the template lines with scissors or a rotary cutter on a self-healing mat.
- Optional but recommended: run each pennant through a laminator for durability and reuse. Laminating paper pennants and reinforcing punch holes prevents tearing and lets you reuse them across multiple parties.
- Punch a hole in each top corner, reinforce with clear tape on the back, then thread twine or ribbon through.
- Space letters evenly by measuring the total string length and dividing by the number of pennants before tying them off.
Verification step: Hang the string loosely between two chairs and step back 10 feet. If any letter is hard to read, swap to a higher-contrast ink color before the party.
The Birthday Balloons Pennant Banner from Usnovelty skips the printing and cutting entirely — it arrives ready to string and hang, which cuts setup time to under 10 minutes.
Printed vinyl banner (skill level: beginner, 30–45 minutes including ordering lead time)
- Build your design file at 300 dpi with a 0.25-inch bleed. Most online print services accept PDF, PNG, or AI files.
- Choose hems and grommets for outdoor use, or a pole pocket if you plan to use a banner stand. Most suppliers offer rush turnaround of 1–5 business days depending on size and finishing options.
- When the banner arrives, unroll it on a flat surface and check for print defects before the party day.
- For outdoor setups, add reinforcement patches at each grommet point using heavy-duty tape on the back side.
- Thread rope or bungee cord through the grommets, leaving a few inches of slack so the banner can move slightly in wind without tearing.
Verification step: Tug each grommet corner firmly. If the material pulls away from the grommet ring, add a second reinforcement patch before hanging.
Pro Tip: Order your vinyl banner at least 5 business days before the party. Rush options exist, but standard production plus shipping to most U.S. addresses takes 3–5 business days. Factor that in when you plan.
How do you hang a birthday banner safely and securely?
The hanging method matters as much as the banner itself. A beautiful vinyl banner tied with a single knot at each end will sag in the middle within an hour.
Installation methods by surface
- Drywall (rental-safe): Command hooks rated for the banner’s weight, spaced every 24–36 inches. 3M Command strips hold up to 16 lbs per pair on smooth drywall — enough for most fabric and vinyl banners.
- Wood trim or studs: Small cup hooks screwed directly into the wood. These hold far more weight than adhesive and leave a hole small enough to fill with a dab of spackle.
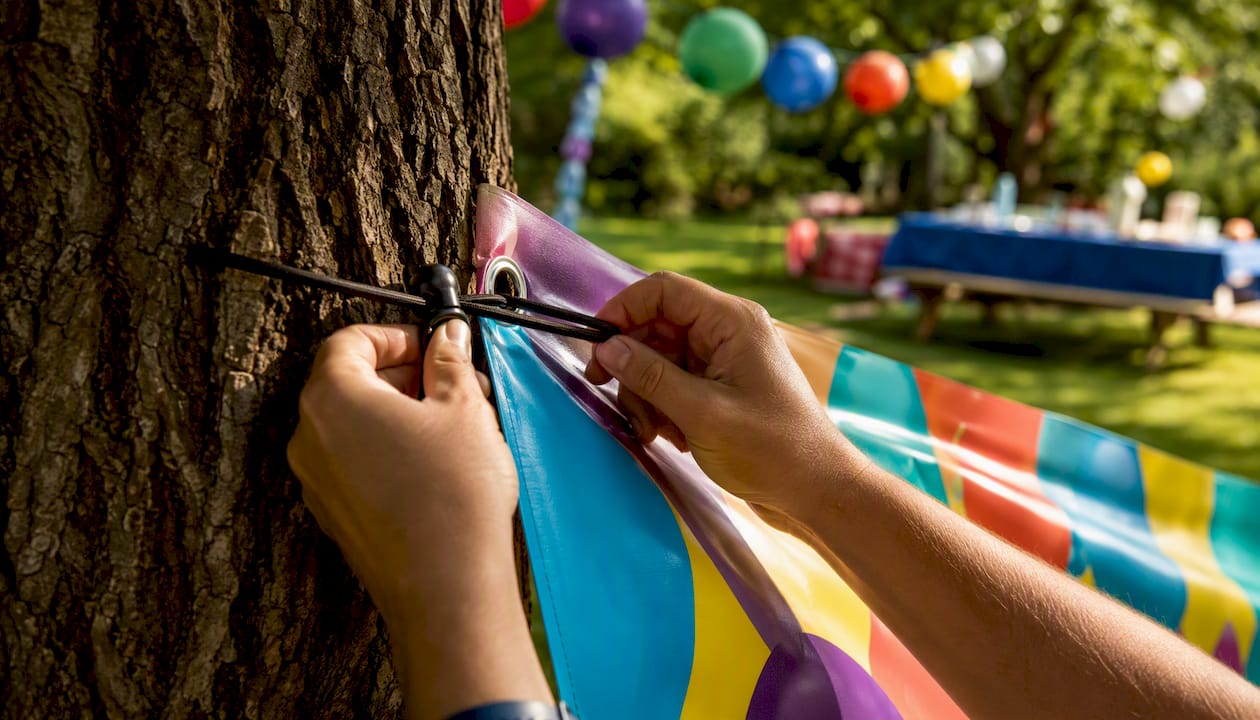
- Fence or pavilion: Zip ties through grommets, pulled tight and trimmed flush. Add a second zip tie at each point for outdoor setups where wind is a factor.
- Banner stand: Slide the pole pocket over the stand’s crossbar. Stands work on any surface and are the fastest option for photo backdrops.
- Ceiling or overhead beam: Fishing line tied to grommets and looped over a ceiling hook. Fishing line is nearly invisible in photos, which is why it is the preferred method for photo-backdrop setups.
Outdoor windproofing
Space grommets every 24 inches along the top edge for banners wider than 4 feet. Add bungee cords instead of rigid rope so the banner can flex without stressing the grommet holes. For very exposed locations, a mesh vinyl with perforations reduces wind resistance significantly.
Height and centering
Mount the top edge of a backdrop banner so the center of the text sits at eye level for a standing adult, roughly 5–5.5 feet from the floor. For above-table installs, 12–18 inches of clearance above the tallest item on the table keeps the banner visible in photos without being cropped.
Following a stepwise setup order — hang heavy wall items first, then set lighting, then hang the banner last — prevents you from having to move the banner around other decor.
Pro Tip: Before committing to adhesive hooks on a rental wall, press one hook firmly for 60 seconds, wait 5 minutes, then tug it. If it holds, the surface is compatible. If it slides, switch to painter’s tape looped into a double-sided strip — it holds lighter banners and removes cleanly.
Common birthday banner mistakes and how to fix them fast
Most setup failures happen in the last 30 minutes before guests arrive. Here is what goes wrong and how to fix it quickly.
Troubleshooting list
- Wrinkles in fabric or vinyl: Lay the banner flat and use a handheld steamer or iron on low heat (fabric) or a heat gun on the lowest setting from 12 inches away (vinyl). Never iron directly on vinyl — always use a pressing cloth.
- Sagging in the middle: Add a third attachment point at the center top edge. For long banners, a small piece of clear fishing line tied to the center grommet and looped over a ceiling hook fixes a sag in under two minutes.
- Uneven or lopsided letters: Pull the banner down, lay it flat, and use a ruler to re-measure spacing from the center outward. Mark the string with a pen at each letter position before re-hanging.
- Wind flapping: Add grommets every 24 inches along the top edge, switch to bungee cords, and add small weights (washers tied to the bottom corners) to keep the banner taut.
- Letters hard to read from across the room: The contrast between text and background is almost always the culprit. A quick fix: photograph the banner with your phone from 15 feet away. If the text is hard to read in the photo, it will be hard to read in person.
Safety reminders
- Never hang a banner directly above candles, open flame, or a grill. Vinyl and paper are flammable.
- For banners hung above guest traffic (doorways, overhead beams), use two independent attachment points so a single failure does not drop the banner on anyone.
- On a ladder, always have a second person steadying the base. Do not lean to the side while holding a banner.
Pre-party final check (10–15 minutes before guests arrive)
- Tug each attachment point firmly
- Step back 15 feet and check that the text is level and readable
- Take a test photo with your phone to confirm contrast and framing
- Check that no banner edge is close to a heat source or in a high-traffic walkway
Which Usnovelty products should you buy for your setup?
Usnovelty has carried party supplies since 1922, and the banner lineup covers the three most common setup scenarios. Here is how to match the product to the job.
- Birthday Balloons Pennant Banner: The fastest option for any setup. It arrives pre-made, strings in minutes, and works for living rooms, backyards, and above cake tables. No printing, no cutting.
- Happy Birthday Sign Banner: Best for small indoor installs above a cake table or on a mantel. Compact, easy to hang with two hooks, and stores flat for reuse.
- Happy Birthday Letter Banner: The personalization option. Individual letters let you rearrange the message, add a name, or spell out a custom phrase. Good for photo backdrops where you want the text to feel intentional.
- Happy Birthday Metallic Party Banner: A mid-size option with a metallic finish that catches light well. Works for both mantel installs and small backdrop setups.
For a photo backdrop, the Letter Banner or Metallic Banner gives you the most visual impact. For outdoor resilience, pair any banner with zip ties and grommet reinforcement. For a last-minute setup under 10 minutes, the Pennant Banner wins every time.
The Top 4 Birthday Banner Options post on the Usnovelty blog walks through each style side by side if you want a deeper comparison before buying.
Pro Tip: Usnovelty offers free shipping on orders over $75. If you are buying a banner plus balloons or tableware, bundle them in one order to hit the threshold and save on shipping.
Final styling, photography, and storage tips
A well-hung banner is only half the picture. How you style around it and photograph it determines whether the party photos look intentional or accidental.
Styling the banner area
- Layer balloons at different heights in front of or beside the banner. A cluster of solid-color balloons at floor level and a few floating at banner height frames the shot naturally.
- Add a string of warm LED fairy lights behind a fabric banner to create a soft glow effect that photographs beautifully without washing out the text.
- For table setups, pair the banner with coordinating tableware. Balloon Party Birthday Glasses and matching napkins tie the color story together without competing with the banner visually.
- Keep the area directly in front of the banner clear of tall items. Anything taller than 18 inches on the table will crop into the banner in photos.
Photography tips
Point your phone camera at the banner from the spot where guests will stand for photos. Check that the text is fully in frame with at least 6 inches of clearance on each side. If the background behind the banner is busy or distracting, a solid-color fabric banner or a printed vinyl backdrop solves the problem immediately.
For the best contrast in photos, shoot with the light source in front of the banner (behind the camera), not behind it. Backlit banners wash out in photos even when they look fine to the naked eye.
Storage and reuse
- Roll vinyl banners around a cardboard tube rather than folding them. Fold lines in vinyl become permanent creases that show in photos.
- Store fabric banners folded in a breathable cotton bag. Plastic bags trap moisture and cause mildew over time.
- For paper pennants, laminate them before the first use and store them flat in a labeled zip-lock bag. They will survive multiple parties without tearing.
- Label each bag with the banner’s dimensions and color so you can grab the right one quickly next time.
Pro Tip: After the party, photograph the finished setup before you take anything down. That photo becomes your reference for the next party — you will know exactly what worked and what to adjust.
The setup approach most people overlook
Most birthday banner guides focus on the banner itself. The part that actually determines whether setup goes smoothly is the order of operations.
Hang the banner before you set the table, before you inflate the balloons, and before you arrange any furniture in front of it. Once a table is loaded with a cake, gifts, and decor, getting behind it to adjust a sagging banner becomes a 10-minute ordeal instead of a 30-second fix.
Usnovelty’s product range, built over more than a century of party supply experience, is designed around exactly this kind of practical setup thinking: ready-made options that skip the DIY steps when time is short, and durable materials that hold up through the whole party. The rule of thumb worth memorizing: measure the space, pick the material that fits the environment, and hang the banner first.
Ready to order your birthday banner from Usnovelty?
Usnovelty ships party supplies across the United States, and the banner lineup covers every setup scenario in this guide: ready-made pennants for fast installs, sign banners for cake tables, letter banners for personalized backdrops, and metallic options for a polished finish. Orders over $75 ship free, so bundling your banner with balloons or tableware makes sense.
For large printed vinyl banners, plan for 3–5 business days of production and shipping time. For everything else in the Usnovelty catalog, standard shipping gets most U.S. orders delivered well before the party date. Head to Usnovelty’s party supplies store to browse the full banner collection and add everything you need in one order.
Sources
- 12-Step Party Decor Setup Checklist for 2026: The Ultimate Guide - Party Checklist
- Easy DIY Birthday Banner Ideas + Tips & Tricks!