

Pulling off a birthday party that looks put-together is harder than it sounds. You have a date circled on the calendar, a rough idea of what you want, and about a hundred decisions standing between you and a space that actually feels festive. The good news is that impressive birthday decorating is less about spending a lot and more about making smart choices early. Whether you are planning a toddler’s first birthday bash or a milestone celebration for an adult, the strategies below will walk you through every step, from the first brainstorm to the final bow tied on the balloon arch.
Table of Contents
- Start with a birthday decoration plan
- Gather your materials and choose high-impact decorations
- DIY birthday décor: simple and creative ideas
- Handling outdoor and summer party decoration challenges
- Our take: what actually makes a birthday party feel “decorated”
- Shop easy birthday décor supplies for every theme
- Frequently asked questions
Key Takeaways
| Point | Details |
|---|---|
| Focus on focal points | Decorating primary areas like the entrance, tables, and photo spot makes the biggest impact for birthdays. |
| Choose a simple theme | Selecting a color palette or repeating design brings unity to your decorations and saves time. |
| DIY and buy smartly | Mix ready-made décor with quick DIY projects for custom, stress-free results. |
| Plan for your space | Outdoor parties require weatherproof décor; think plants and sturdy tableware. |
| Prep ahead for ease | Assemble your focal décor pieces a day in advance to cut down setup stress. |
Start with a birthday decoration plan
Let’s begin with the building blocks that ensure your decorating efforts turn out cohesive and memorable.
Before you order a single balloon or cut a single length of ribbon, you need a plan. Decorating without direction is the fastest way to end up with a pile of mismatched supplies that somehow cost more than expected while looking less impressive than you hoped. A plan keeps every purchase purposeful.
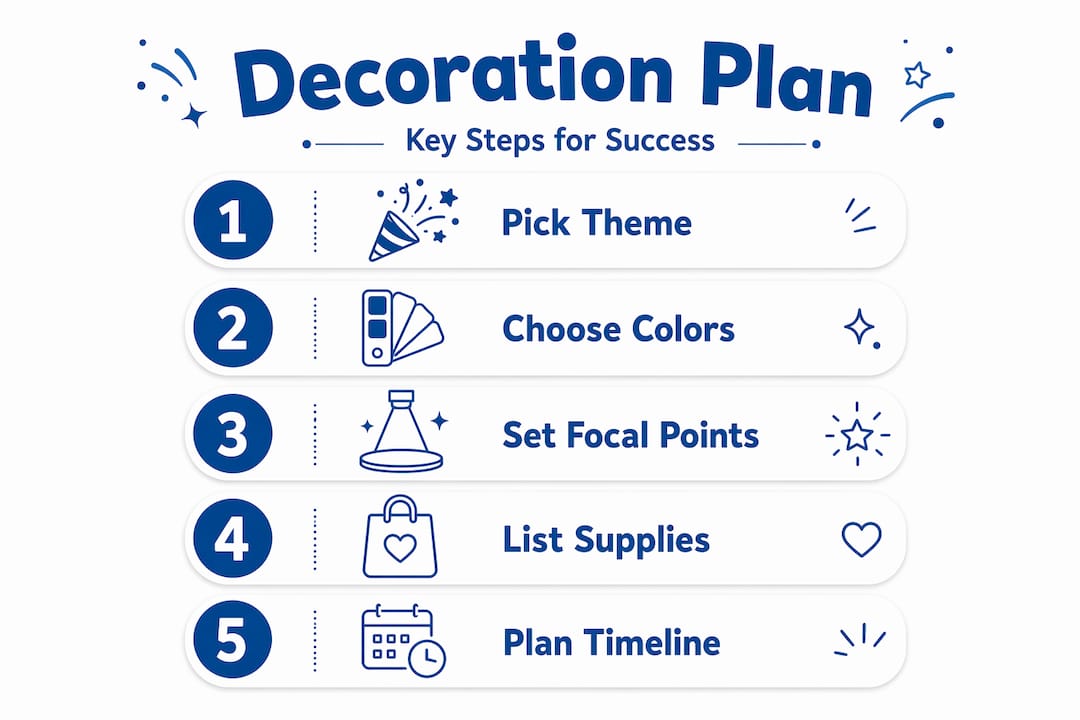
Step one: lock in your theme and color palette. These two decisions will guide everything else. A cohesive color palette or a repeated design element, rather than a wide-open “party” concept, is what separates a polished look from a random one. As Martha Stewart’s hosting advice makes clear, going overly broad dilutes your theme and makes it hard to shop with focus. Pick two or three colors, or a single character, sport, or style, and stick with it.
Step two: identify your focal points. Not every wall or surface needs decoration. Instead, zero in on three areas: the entrance, the main table or food station, and a backdrop or photo zone. These are the spots guests see first, gather around most, and photograph constantly. Pouring energy into those three areas creates the impression of a fully decorated space, even if the rest of the room is relatively plain.
Good planning celebration decorations always starts with a written checklist rather than a mental one. A written list lets you see gaps, avoid duplicate purchases, and delegate tasks to helpers. A simple checklist approach, where you decide your theme and palette first and then buy or DIY pieces that support your photo zone and table look, significantly reduces planning mistakes. Balloon elements, for example, can be prepared ahead of time to simplify day-of setup.
| Décor decision | When to decide | Who handles it |
|---|---|---|
| Theme and color palette | 3 to 4 weeks out | Party planner or host |
| Backdrop and banner | 2 to 3 weeks out | Buy or DIY |
| Tableware and centerpieces | 2 weeks out | Purchase or gather |
| Balloons and garlands | 1 week out, inflate day before | Host or helper |
| Final placement and styling | Day of the party | Everyone |
Pro Tip: Prioritize your photo zone and main table above all else. Guests will gather there, take pictures there, and remember how it looked. If your budget or time runs short, that is where your best materials should go. You can find solid guidance on birthday decor basics to make sure your priorities are dialed in from the start.
Here is a quick checklist to run through at the planning stage:
- Choose 2 to 3 primary colors and 1 accent color
- Name your three focal zones: entrance, table, and backdrop
- List supplies needed for each zone
- Decide which items you will buy ready-made and which you will DIY
- Assign prep tasks and deadlines
Gather your materials and choose high-impact decorations
With your overall plan set, it’s time to assemble what you need and focus effort for the greatest effect.
Once you have your theme and focal points mapped out, shopping becomes much easier. You are not wandering the party aisle hoping something sparks an idea; you are filling specific slots in a specific plan. The most impactful birthday decorations share one trait: they draw the eye immediately without requiring the guest to look at a dozen different surfaces.
A practical approach to birthday décor is to focus spending and energy on high-impact focal points like the entrance and the backdrop area, rather than spreading effort thin across every corner of the room. The entrance sets expectations the moment someone walks in. The backdrop becomes the memory in every photo. Those two locations alone justify most of your budget.
Comparison: buy vs. DIY for core birthday décor pieces
| Décor item | Buy ready-made | DIY option | Best for |
|---|---|---|---|
| Banner | Quick, polished look | Cardstock letters, foam tape | Either works depending on time |
| Balloon garland | Faster, pre-made kits | Self-inflate with garland strip | DIY saves money, takes more time |
| Centerpiece | Immediate visual impact | Balloon cluster in a vase | DIY for personalized color |
| Backdrop | Professional look, premium cost | Paper fans, streamers, foil sheets | DIY for budget-conscious hosts |
| Tableware | Always buy | N/A | Buying is faster and cleaner |
Here is a numbered approach to building your decoration setup in the right order:
- Choose your “wow” item first. This is the one piece that anchors the entire look, usually a balloon arch, a bold banner, or a large backdrop panel.
- Add supporting elements that frame the wow item, like smaller balloons, coordinating tableware, and a simple centerpiece.
- Bring in texture or dimension with paper fans, metallic accents, or a garland.
- Fill the table with themed plates, napkins, and cups that match your palette.
- Add small finishing touches like confetti, candles, or a personalized sign.
A good starting point for the banner layer of your setup is a birthday balloons pennant banner, which delivers a ready-made, festive look without any assembly stress. From there, you can layer in your DIY elements. For further balloon decoration ideas, there are plenty of creative configurations to try, from simple clusters to full ceiling installations.
Remember: not every surface needs decoration. Restraint is not a flaw, it is a feature. A few deliberate, well-placed elements always look better than an overwhelming jumble of supplies that fight for attention.
DIY birthday décor: simple and creative ideas
Now that you have your main supplies, let’s make standout decorations that feel personal and fun without a ton of effort.
DIY decorations have one enormous advantage over store-bought: they can be tailored exactly to your theme, your color palette, and your budget. The key is choosing projects that are achievable in the time you have, not ambitious projects that turn a fun afternoon into a stressful scramble.
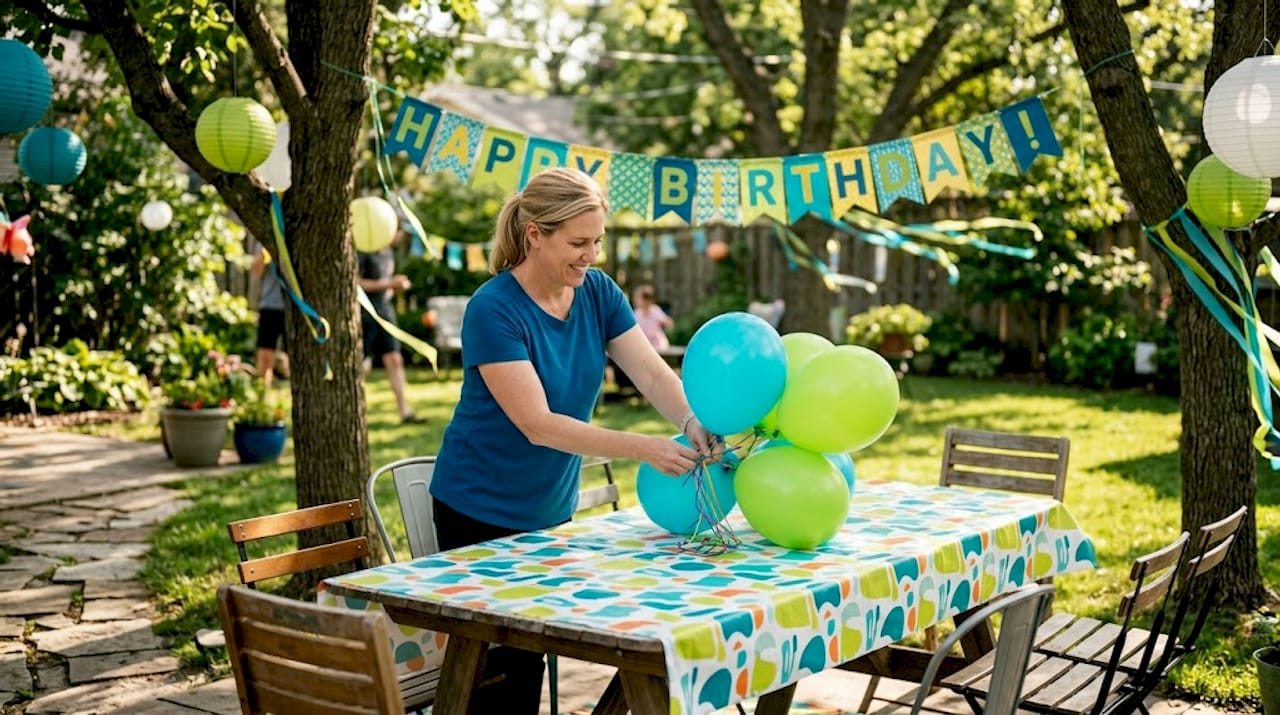
Balloon garlands are consistently the most impactful DIY project relative to effort. You need balloons in two or three coordinating sizes, a long balloon strip, and a fishing line or hook to mount it. Inflate the balloons, attach them in alternating sizes along the strip, and drape it over a doorway, table edge, or backdrop frame. The result looks like something a professional installed, and it costs a fraction of the price.
Custom banners are another strong DIY choice. Using cardstock panels and foam tape, you can spell out a name, age, or phrase in your exact palette colors. A DIY balloon banner tutorial typically calls for cardstock sheets, foam adhesive tape, ribbon, and a punch for the hanging holes. The materials are inexpensive and the build takes less than an hour once you have everything laid out.
Simple centerpieces do not require expensive florals or complicated builds. A balloon cluster anchored in a weighted base, a small jar of themed candy, or a framed photo of the birthday person all work beautifully. For themed parties, adding a printed character cutout to a simple balloon cluster instantly ties the table to the overall theme.
For first birthday parties specifically, the bar is more achievable than most parents expect. First-birthday party themes translate naturally into décor decisions like palette choices, banner phrasing, and simple props. The goal is a few well-executed, low-stress elements, not a magazine-worthy production that exhausts the host before guests arrive.
Here is a materials list for the three main DIY projects:
- Balloon garland: balloons in two to three sizes, balloon strip, clear fishing line, command hooks
- Custom banner: cardstock sheets, foam adhesive tape, ribbon or twine, hole punch, marker or printer
- Centerpiece: latex balloons, balloon weight or sand-filled vase, curling ribbon, optional printed topper
One especially fun option for a foil-finished look is a painted balloons foil banner, which pairs well with a DIY balloon garland in matching colors for a cohesive, layered backdrop.
Pro Tip: Prepare all balloon, paper, and banner pieces the day before the party. Inflated balloons stay fresh overnight, and pre-cut banner letters can be assembled in minutes the next morning. Doing this the night before cuts your setup time in half and keeps party-day stress at a minimum.
Handling outdoor and summer party decoration challenges
If your celebration is outside, a few simple adjustments can save your décor from summer’s surprises.
Outdoor birthday parties are beautiful in theory and occasionally challenging in practice. Heat wilts things. Wind topples things. A sudden afternoon shower destroys things. Planning around these realities is not pessimistic; it is just smart.
When decorating for outdoor or summer birthday parties, prioritize décor that holds up to heat, like container plants or potted flowers, instead of items that wilt quickly in hot sun. Fresh-cut floral arrangements and tissue paper decorations are the first casualties of a summer afternoon.
Here are the key swaps and strategies for outdoor setups:
- Use container plants instead of cut flowers. Potted plants or succulents look great on tables, hold up in heat, and can be taken home as party favors after the event.
- Choose weighted or staked banner setups. A banner strung between two poles with stakes driven into the ground survives wind far better than one taped to a fence.
- Swap paper tableware for sturdier options. Heavier-stock plates and cups are less likely to blow off the table when a breeze picks up.
- Anchor balloons individually. Tie every balloon to a weight or a table element so a gust does not send them into a neighbor’s yard.
- Keep sun-sensitive décor in the shade. Foil balloons last longer out of direct sunlight, and chocolate or wax-based decorations should never sit in full afternoon sun.
- Have a backup plan for fragile items. Keep a small box of replacement supplies on hand so a snapped banner or popped balloon does not leave a gap in your setup.
Timing matters outdoors too. Set up in the morning before temperatures peak, and do a walk-through to check what is at risk. Anything that relies on tape alone on an outdoor surface is a liability.
Our take: what actually makes a birthday party feel “decorated”
With the main how-to wrapped up, here is what truly matters based on real-world party experiences.
There is a widespread belief that a great birthday party requires decoration on every available surface. Tables, walls, windows, chairs, and even the ceiling. This belief is responsible for more overspending and pre-party anxiety than any other single idea in the party planning space. It is also, frankly, wrong.
Guests do not inventory your decorations. They absorb the atmosphere. What they notice is whether the space feels intentional and festive, not whether you hung bunting in the bathroom. A single stunning balloon arch positioned behind the birthday person’s seat at the table creates more impact than twenty scattered decorations spread across the entire room.
The photographers in your guest list will tell you the same thing: they are constantly angling to cut out visual noise and get a clean shot of the focal point. When you over-decorate, every photo looks cluttered. When you focus, every photo looks polished.
We have seen parties where the host spent three times the budget and still ended up with a space that felt chaotic. We have also seen parties where a great balloon garland, a coordinated table, and a hand-lettered banner created a room that guests could not stop photographing. The difference was not money or volume. It was intention.
Our honest recommendation is this: channel your energy and your budget into two or three items that genuinely spark joy and look great in photos. A well-chosen banner, a bold balloon installation, and a dressed-up cake table will carry an entire party. Everything else is optional. Looking for a solid reference point to start from? The birthday décor basics guide lays out a focused, achievable approach that aligns with exactly this philosophy.
Less, placed well, will always beat more, scattered everywhere.
Shop easy birthday décor supplies for every theme
Ready to put these ideas into practice? Explore your options for instant party upgrades.
You do not have to hunt down supplies from a dozen different sources to pull this off. US Novelty carries a wide range of theme-coordinated birthday decorations, from foil banners and pennant strings to balloon centerpieces and tableware, all in one place. Whether you are buying ready-made pieces or filling in around your DIY projects, having access to quality supplies that actually match is what keeps a party looking cohesive.
Start with your focal points. A painted balloons foil banner gives you that instant, polished centerpiece element without any assembly time. Then add dimension with a balloon mini cascade centerpiece for the main table. Orders over $75 ship free, so you can stock up on everything you need in a single trip without worrying about extra fees. A stylish, stress-free birthday setup is genuinely within reach.
Frequently asked questions
What are the easiest birthday decorations for maximum impact?
Focus on a standout balloon display, a bold banner, and a decorated food or cake table for the biggest visual effect. High-impact focal points like the entrance and a photo area deliver far more than decorating every surface.
How do I pick the right color palette or theme?
Choose favorite colors, hobbies, or a simple repeated design for a cohesive, personalized look. A unifying theme element, like a color palette or repeated motif, works better than a broad, unfocused concept.
What are good outdoor birthday decoration options?
Use container plants, sturdy tableware, and secured banners that withstand heat or wind. Prioritizing heat-resistant décor over fresh-cut flowers or tissue paper keeps your setup looking great all afternoon.
How early can I set up balloon decorations?
You can prepare balloon garlands and banners a day before the event to save time on party day. Balloon elements prepared ahead stay fresh overnight and simplify setup dramatically.
How can I make a birthday banner at home?
You can use cardstock, foam tape, and a simple DIY tutorial to create a custom banner matching your theme colors. A balloon banner DIY build is straightforward, affordable, and fully customizable to any party palette.